Candle making has seen a resurgence in popularity, fueling the creativity of many hobbyists and artisans across Australia. Whether you seek a relaxing pastime or wish to craft gifts for your loved ones, starting with the right supplies is crucial. In this guide, we’ll explore the essentials of candle making, highlight some of the best kits available in Australia, and provide tips for a successful candle-making experience.
Understanding the Basics of Candle Making
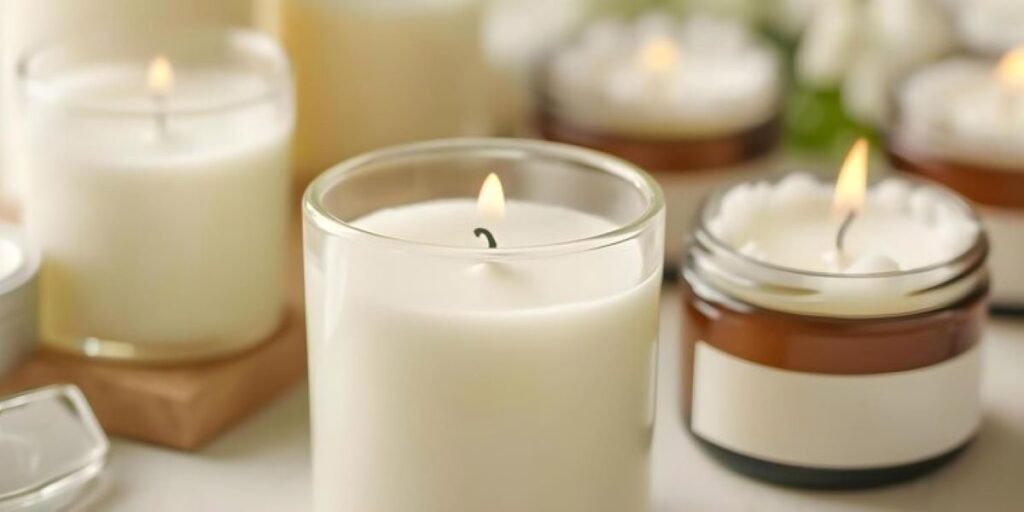
Candle making kit is both an art and a science, requiring knowledge of materials and techniques. At its core, the process involves melting wax, adding scents and dyes, and pouring the mixture into a mold where a wick is placed. Once it cools, you have a beautifully crafted candle ready to light. The satisfaction of creating something with your own hands can be incredibly rewarding, whether you’re making candles for personal use, gifts, or even to sell. The possibilities are endless, and with a little creativity, you can design candles that reflect your unique style and preferences.
Understanding the fundamental principles, such as how different waxes respond to heat and how wicks behave, can help you produce superior candles. Additionally, being aware of the safety precautions necessary when working with hot wax will ensure a safe and enjoyable experience. For instance, always work in a well-ventilated area and keep flammable materials away from your workspace. Learning about the chemistry behind scent throw and burn rates can also elevate your candle-making skills, allowing you to experiment with different combinations and achieve the desired ambiance in your space.
Essential Tools for Candle Making
To embark on your candle-making journey, you will need some essential tools. Here’s a comprehensive list:
- Double boiler or a wax melter for safe melting
- Candle thermometer to monitor the wax temperature
- Pouring pitcher to transfer melted wax into molds
- Wicks – different types for various candle styles
- Wax – paraffin, soy, or beeswax, depending on your preference
- Fragrance oils and dyes for customization
- Stirring sticks for mixing
- Scale to measure ingredients
- Protective gear like gloves and goggles
Having the right tools can significantly influence the quality of your finished product. Investing in quality equipment will pay off, especially if you plan to make candles regularly. Additionally, consider setting up a dedicated workspace where you can keep your tools organized and easily accessible. This will not only streamline the process but also enhance your creativity, allowing you to focus on perfecting your craft without distractions.
Types of Wax and Their Uses
Choosing the right wax is fundamental in candle making, as each type has its unique properties and benefits. Here’s an overview of the most common waxes:
- Paraffin Wax: The most common candle wax, known for its affordability and versatility. It has excellent scent throw and is easy to color.
- Soy Wax: A natural alternative, soy wax burns cleaner than paraffin. It is a popular choice for eco-conscious crafters.
- Beeswax: Known for its natural honey scent, beeswax is the most natural option but tends to be more expensive. It burns longer and produces little smoke.
- Palm Wax: A renewable resource known for its unique crystal-like appearance, palm wax is another eco-friendly option.
Ultimately, the choice of wax will depend on your personal preference and the specific properties you wish your candles to possess. For instance, if you’re aiming for a long-lasting burn with a pleasant aroma, soy or beeswax might be your best bet. Alternatively, if you’re looking to create vibrant colors and strong fragrances, paraffin wax could be the ideal choice. Experimenting with different waxes can also lead to exciting discoveries, such as blending waxes to achieve a unique texture or burn quality that sets your candles apart from the rest.
Top-Rated Candle Making Kits in Australia
For beginners, using a candle making kit can streamline the process, providing you with all necessary materials and tools in one package. Below are some of the top-rated kits available in Australia that cater to various skill levels.
Review of the Best Beginner Kits
Beginner kits are designed to make the candle-making process easy and enjoyable. One of the most highly recommended options is the Complete Candle Making Starter Kit. This kit includes:
- 3 lbs of soy wax
- A variety of wick sizes
- Fragrance oils
- Dyes
- Step-by-step instructions
The simplicity of this kit makes it perfect for those just starting. Furthermore, users have praised its ease of use and the quality of the candles produced. Many beginners have found joy in customizing their candles with different scents and colors, allowing for a personal touch that makes each creation unique. The step-by-step instructions are particularly helpful, guiding users through the entire process from melting the wax to pouring it into molds, ensuring a successful outcome every time.
High-Quality Kits for Advanced Candle Makers
For those with more experience, the Deluxe Candle Making Kit offers advanced tools and materials. This kit contains:
- 5 lbs of premium beeswax
- Specialty wicks suitable for various candle types
- A selection of high-quality fragrance oils
- Beautifully designed molds
- Detailed recipe book for experimenting with different blends
This kit caters to advanced candle makers who want to expand their artistry and create stunning, high-quality candles. The premium beeswax not only provides a longer burn time but also emits a natural honey scent that enhances the overall experience. Additionally, the beautifully designed molds allow for creative shapes and sizes, making it possible to craft candles that are not just functional but also serve as decorative pieces. The included recipe book is a treasure trove of inspiration, featuring unique blends and techniques that encourage makers to experiment with layering scents and colors, pushing the boundaries of traditional candle making.
Factors to Consider When Choosing a Candle Making Kit
When selecting a candle making kit, several factors should be considered to ensure you get the most out of your purchase.
Assessing the Quality of Wax and Wicks
The quality of ensuring good results cannot be overstated. Always assess the type and quality of wax and wicks included in your kit. Look for kits that use high-quality, natural waxes and properly sized wicks for optimum performance and longevity. Paraffin wax, while common, can emit harmful chemicals when burned, so opting for soy, beeswax, or palm wax can be a healthier choice. Additionally, the wick’s material and size play a crucial role in how well your candle burns, affecting everything from the flame height to the scent throw.
Importance of Scent and Color Options
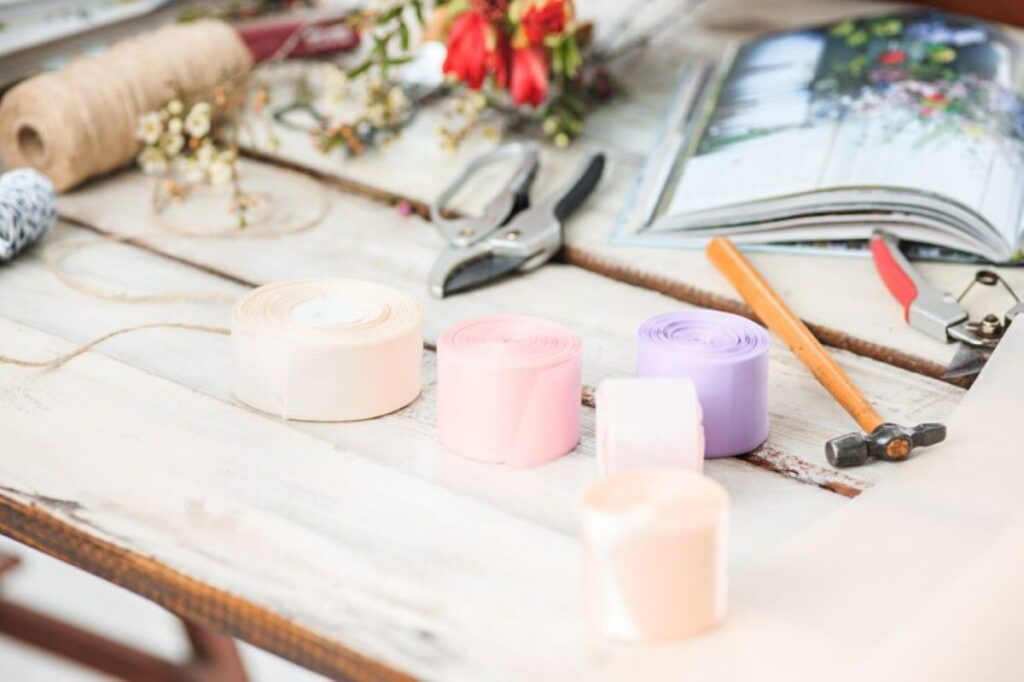
The ability to customize your candles with scents and colors can greatly enhance the crafting experience. Look for kits that provide a selection of fragrance oils and color dyes. This flexibility enables you to create personalized candles that match your style and mood. Consider experimenting with essential oils for a more natural approach, as they not only provide delightful aromas but also offer therapeutic benefits. Furthermore, the color options can add a visual appeal to your candles, allowing you to create stunning pieces that can serve as decor or thoughtful gifts. Whether you prefer soft pastels or vibrant hues, a diverse palette can inspire creativity and make your candle-making journey even more enjoyable.
Tools and Accessories Included
Another vital aspect to consider is the range of tools and accessories included in the kit. A comprehensive kit should come with essential tools such as a thermometer for monitoring wax temperatures, a pouring pitcher for easy transfer, and a stirring utensil for mixing scents and colors. Some kits even include molds or containers, which can save you time and effort in sourcing these items separately. Having the right tools not only makes the process smoother but also enhances the overall quality of your finished candles. Additionally, look for kits that offer safety equipment, like gloves and protective eyewear, to ensure a safe crafting environment, especially for beginners.
See Also : Beginner Candle Making Kits: Everything You Need to Start Creating Candles
Step-by-Step Guide to Making Your First Candle
Now that you’ve gathered your tools and selected a kit, it’s time to make your first candle. Follow this straightforward guide to get started.
Preparing Your Workspace
Before you begin, set up a clean and organized workspace. Make sure to protect surfaces with newspaper or a drop cloth, as melted wax can be difficult to clean. Gather all your materials and tools so they are within easy reach. Consider using a dedicated area where you can leave your supplies out for future projects, as candle making can quickly become a delightful hobby that you’ll want to revisit. Ensure that your workspace is well-ventilated, especially if you’re using strong fragrance oils, as this will help prevent any overwhelming scents from lingering in the air.
Melting the Wax and Adding Fragrance
Using a double boiler, melt your wax over low to medium heat. Once it reaches the recommended temperature, add your fragrance oils. Stir gently to combine, ensuring the scent is evenly distributed. It’s important to note that different types of wax, such as soy, paraffin, or beeswax, may require different melting temperatures and fragrance load percentages. Experimenting with various wax types and fragrances can lead to discovering your personal favorites. Additionally, consider adding color to your wax with candle dyes for a more visually appealing result, allowing your creativity to shine through in your finished product.
Setting the Wick and Pouring the Wax
Once the wax is ready, carefully secure the wick in your mold using a wick holder or a small dab of melted wax. Slowly pour in the melted wax, being careful to avoid splashes. Allow the candle to cool completely before trimming the wick. As the wax cools, you might notice some surface imperfections or sinkholes forming. Don’t worry; these can often be fixed by re-melting a small amount of wax and topping off the candle. This process not only enhances the appearance but also ensures a more even burn when you light your candle. Take this time to reflect on the scents and colors you’ve chosen, as they will create the ambiance and mood in your space when the candle is lit.
Tips and Tricks for Successful Candle Making
To improve your candle-making process, consider these tips that will enhance your skills and enjoyment.
Troubleshooting Common Candle Making Problems
Every candle maker faces challenges, whether it’s tunneling, uneven burns, or scent throw issues. Understanding the common problems can help you troubleshoot effectively:
- If your candles tunnel, ensure the wick is the correct size for the candle diameter.
- To avoid unsightly cracks, pour the wax at a suitable temperature.
- Enhance scent throw by adding fragrance oil at the recommended temperature.
How to Achieve the Perfect Burn
A well-burning candle should have a clean, even flame. Trim the wick to about 1/4 inch before each use to promote an even burn and reduce soot. Additionally, allow your candle to burn long enough for the wax to melt evenly across the surface during each use, which prevents tunneling.
Conclusion
Embarking on candle making can be a fulfilling and creative outlet. By choosing the right tools, selecting quality materials, and following the proper techniques, you can create beautiful candles that lighten your space and delight your senses. Whether you start with a beginner kit or invest in more advanced supplies, the journey of candle making in Australia is a rewarding one.